


.webp)
.webp)
.webp)
.webp)
.webp)
.webp)
.webp)
.webp)
.webp)
Description 3d printer anycubic photon m3 max 7k

Specifications Anycubic Photon M3 Max 7K
- Exposure screen: 13.6" monochrome
- Print Accuracy: 6480 x 3600 pixels (7K)
- Contrast ratio: 450:1
- Light Source: Parallel Matrix (LED Bulbs x 84)
- Assembly Platform: Laser Engraved Platform
- Print speed: ≤ 60mm/hour
- Control panel: 4.3 inch resistive touch control panel
- Data input: USB-A 2.0
- Power Consumption: Rated 120W
- Print size: 300 x 298 x 164 mm/ 11.8 x 11.7 x 6.46 inches. (HWD)
- Print Volume: 14.7L/498.5oz
- Machine dimensions: 596 x 400 x 408mm / 23.5x15.7x16 inches. (HWD)
- Machine weight: 21 kg / 46.3 lbs

Thank you for choosing Anycubic products!
If you have purchased an Anycubic printer or are familiar with 3-print technology, we still recommend
you to read this manual carefully. The precautions and operation method given in this manual can help you avoid improper installation and operation.
Precautionary measures
Always remember the following precautions when assembling and operating, failure to follow these precautions may result in equipment damage or even personal injury.
.jpg) |
If any accessory parts were not supplied with printer, contact the after-sales service personnel to request an additional shipment! |
.jpg) |
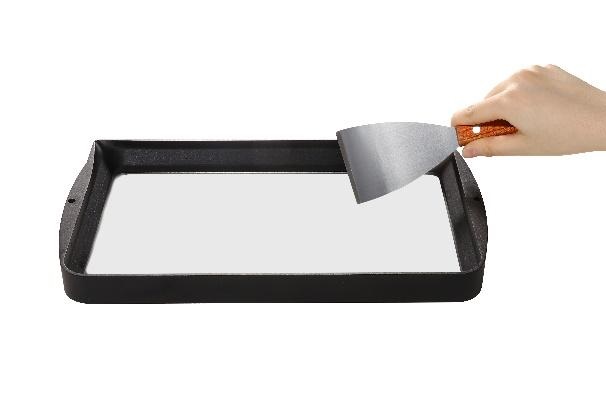
When removing the model from the print platform, be careful not to cut your fingers with a sharp object. |
.jpg) |
In case of emergency, turn off the power of the Anycubic 3D Printer directly. |
.jpg) |
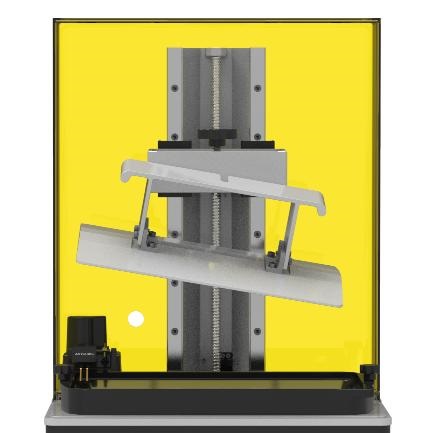
Anycubic 3-printer has fast moving parts, so be careful not to pinch your hands. |
.jpg) |
It is recommended to wear protective goggles when assembling the Anycubic 3D Printer or sanding the model. |
.jpg) |
Keep the Anycubic 3D Printer and its accessories out of the reach of children. |
.jpg) |
Use the Anycubic 3D Printer in a spacious and well ventilated area. |
.jpg) |
If the Anycubic 3D Printer will not be used for a long time, take protective measures against rain and moisture for it. |
.jpg) |
The recommended ambient temperature is 8°C to 40℃ and the humidity is 20% to 50%. Operating the printer at temperatures and humidity outside these limits may result in poor print quality. |
 |
Do not disassemble and assemble the Anycubic 3D Printer yourself. If you have any questions, please contact Anycubic after-sales service personnel. |
Printer Options Anycubic Photon M3 Max
| System | Anycubic Photon M3 Max |
| Operation | 4.3" resistive touch screen |
| Slicer | Anycubic Photon Workshop |
| Connection method | USB stick |
| Technology | Photopolymer printing with LCD screen |
| Light source | Imported LEDs, matrix light source (wavelength 405nm) |
| XY Resolution | 46um 6480*3600 pixels (7K) |
| Z-axis positioning accuracy | 0.01mm |
| Layer thickness | 0.01 - 0.1 mm |
| Rated power | 120 W |
| Printer size | 400mm(L)*408mm(W)*596mm(H) |
| Print volume | 298mm(L)*164mm(W)*300mm(H) |
| Material | 405 nm UV photopolymer scrap, dental non-cast resin. |
| Printer weight | ~ 21 kg |
Recommended print settings for Anycubic Photon M3 Max
| Layer thickness | 0.05 mm |
| Normal exposure time | 3 s |
| Light off delay | 2 s |
| Base layers exposure time | 30 s |
| Number of base layers | 6 |
| Z-axis lifting height | 10 mm |
| Z-axis lifting speed | 4 mm/s |
| Z-axis retraction speed | 4 mm/s |
| Smoothing level | 1 |
The above recommended parameters are based on testing with Anycubic resin.
Packing list
.png)
.png)
.png)
General view of the Anycubic Photon M3 Max printer
.png)
.png)
Anycubic Photon M3 Max Automatic Refueling Module
.png)
.png)
Anycubic Photon M3 Max Touch Screen Feature Description
.png)
.png)
.png)
.png)
.png)
.png)
.png)
Gear icon: Used to set the auto fill rate.
Refuel icon: Used to enable/disable automatic refill.
Sound icon: Used to enable/disable the touch screen sound.
Assembly and Alignment Description Anycubic Photon M3 Max
1. Take out the tool kit, unscrew the 8 screws fixing the iron frame, then remove the foam and ties, take out the printer and its accessories.
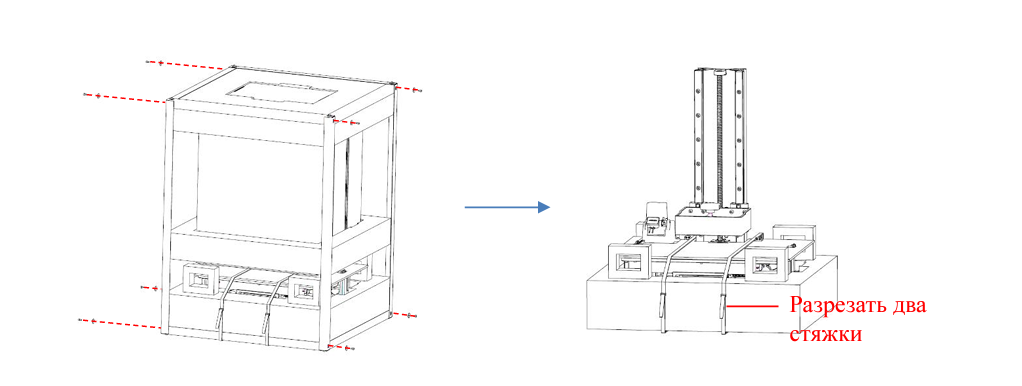
* The iron frame has sharp edges, be careful when disassembling so as not to hurt your hands.
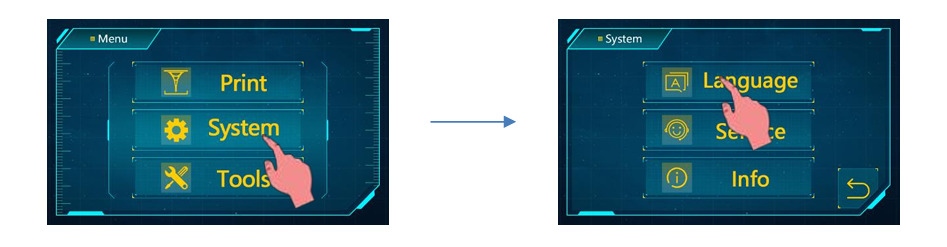
2. Plug in the power cord and turn on the power switch. Select the desired language.
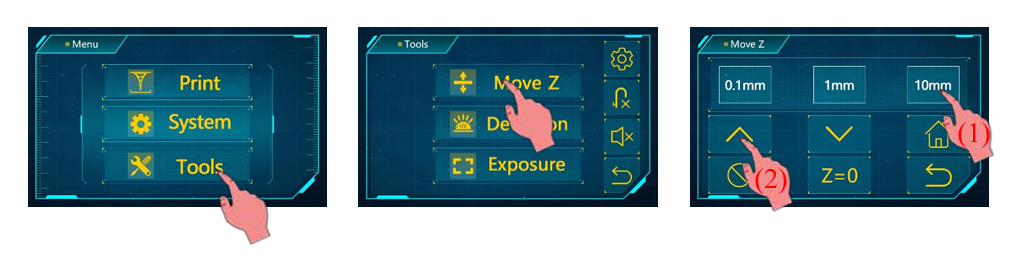
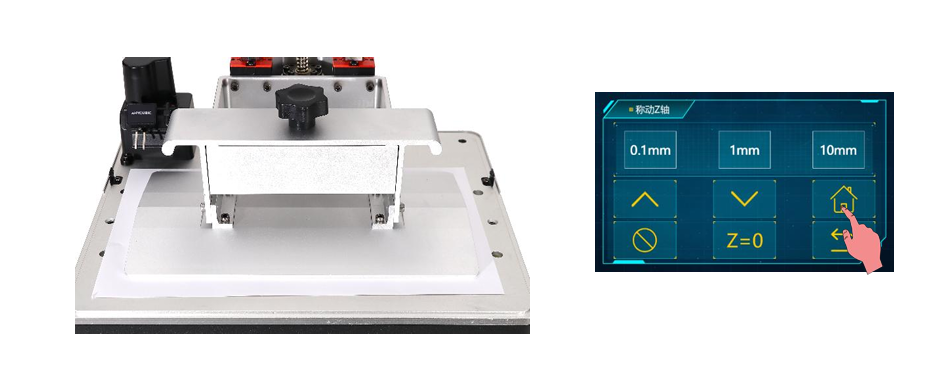
3. Return to the main menu, click "Tools" → "Move Z", raise the Z axis to a certain height so as not to scratch the LCD screen when installing the printing platform.
4. Remove the factory protective film from the LCD screen.

5. Loosen the 4 screws on the print platform.
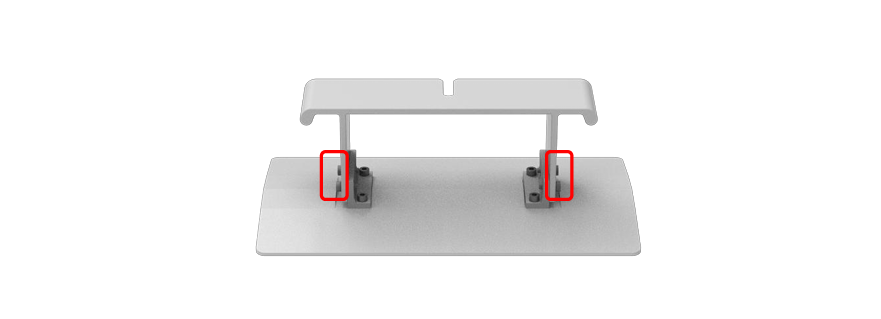
6. Install the print platform.
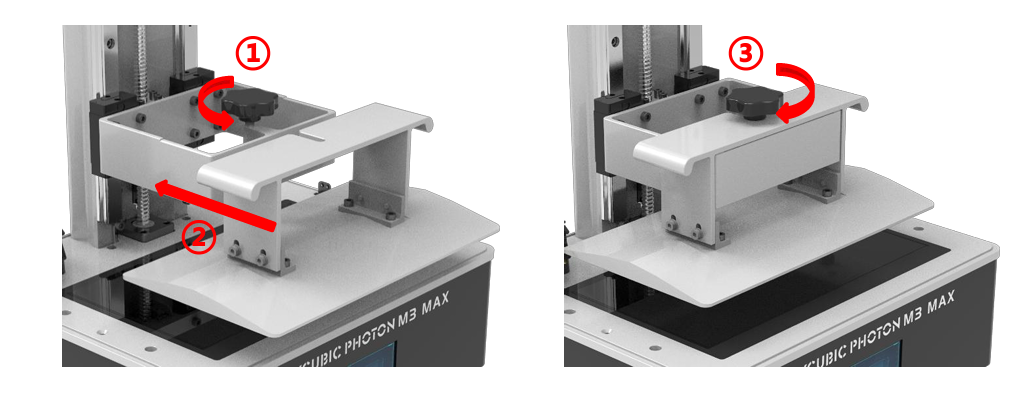
7. After placing a sheet of alignment paper on the LCD screen (paper supplied with the printer), press “ ◊ ” on the operation screen, wait until the Z axis goes down and stops automatically.
8. While pressing onto the platform with your hand, tighten the 4 screws to secure the platform.

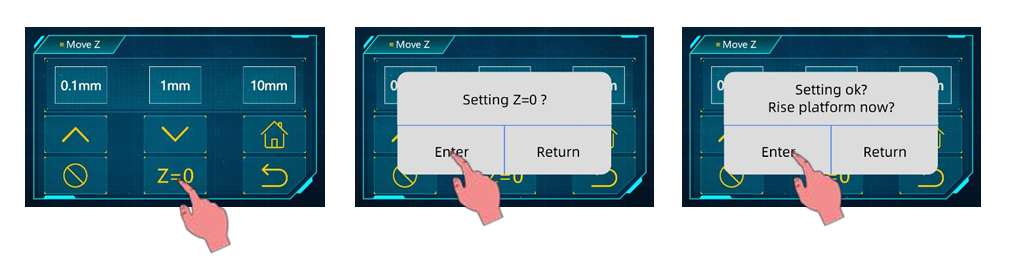
9. After completing the above steps, press "Z=0" to save the zero position, at this time a dialog box will pop up, click "OK" on it, and the platform leveling will be completed. After setting successfully, press "OK" to raise the platform to the level of the resin bath, then pull out the paper.
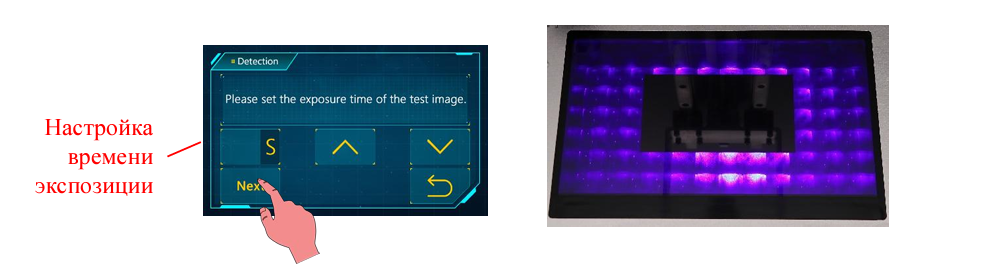
10. Check if the UV lamp is working properly: While in the "Move Z" interface, raise the print platform until the entire LCD screen is visible. Return to the "Tools" interface, enter the testing interface to set the exposure time, then click the "Next" button. At this time, if the LCD screen displays the test image shown in the figure, it means that the UV lamp and LCD screen are working normally.
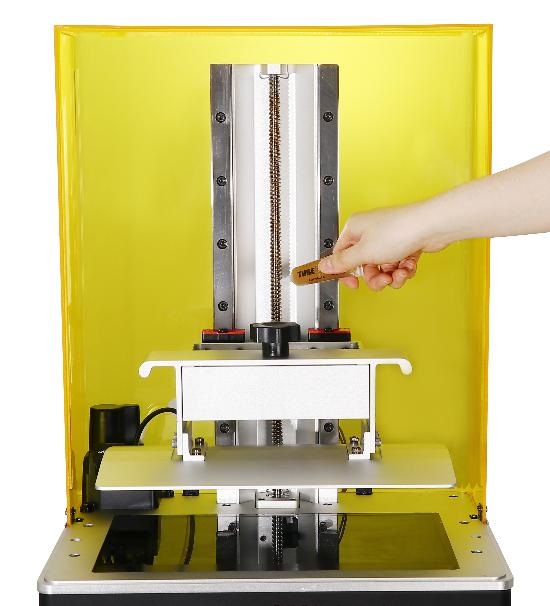
11. Slowly insert the resin bath until the needle probe is fixed in the bath, then hand-tighten the screws on both sides.

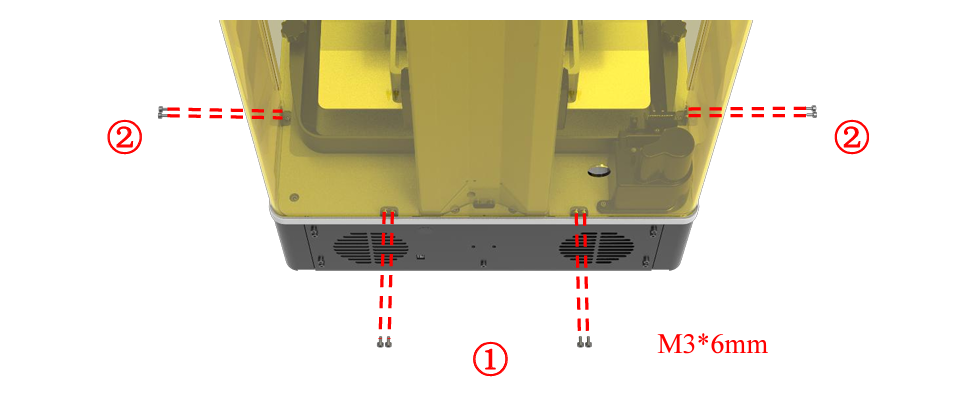
12. Installing the back of the protective cover If the automatic threading module is not required yet, then the printer assembly is completed.
13. Turn the back of the printer towards you, then install the resin bottle holder.
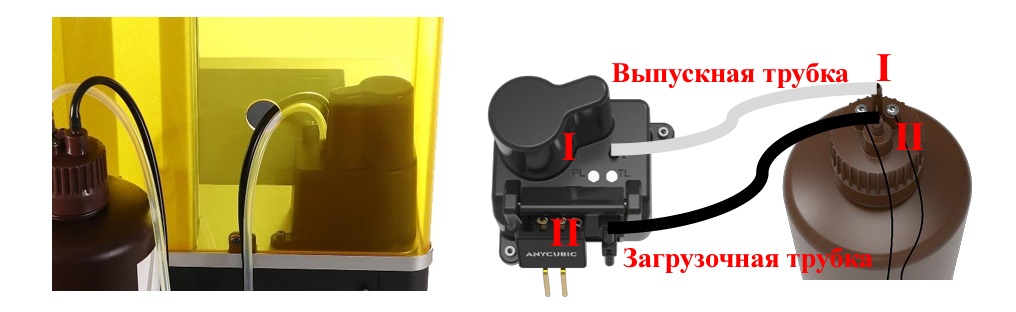
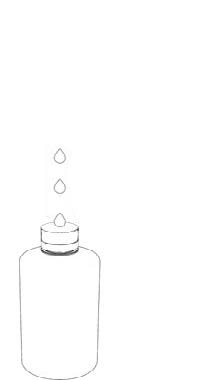
14. Insert the cap into the 1kg Anycubic Resin bottle, tighten it, then place it on the holder. The detection cable on the bottle cap is connected to the port on the rear panel.
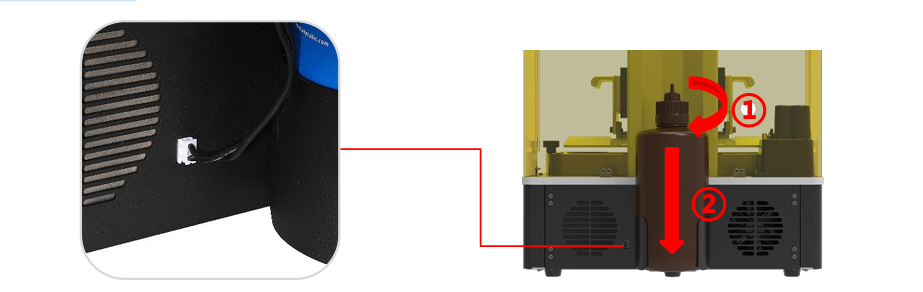
When changing the resin bottle, it is recommended to turn the body of the bottle with the cap securely closed to avoid clogging the silicone tube due to twisting.
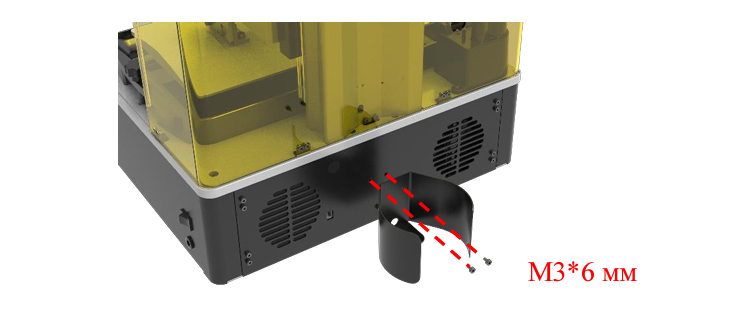
15. Pass 2 silicone tubes through the restriction holes on the back of the protective cover. Then connect the bottle cap to location II of the detection module with the loading tube (black tube), connect the bottle cap to location I of the detection module with the outlet tube (transparent tube). Be sure to install the tubes in the above way, otherwise it may cause malfunction of the automatic charging module.
Anycubic Photon M3 Max Automatic Refill
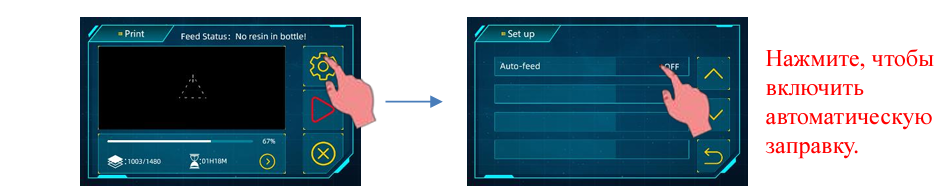
1. Instructions for use Make sure that the automatic resin filling module and the resin bottle have been installed before enabling this function, and that enough resin has been added to the bottle. Press the "∫" button on the "Tools" interface to enable this function. If it is detected during printing that there is not enough resin in the vat, the vat will be automatically filled. The refill speed can be adjusted by pressing the refill speed button.
• Automatic threading only works when printing.
• If resin is not detected by the probe 5 minutes after charging is completed, charging will be repeated.
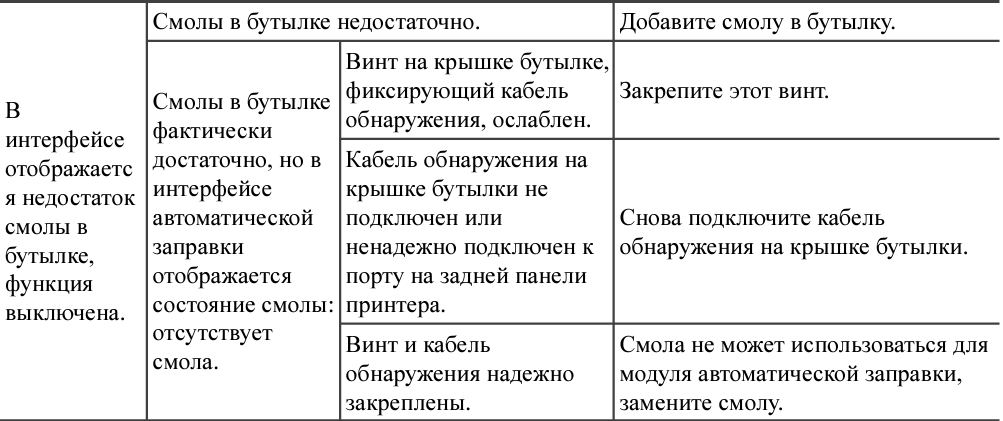
• If the red indicator of the detection module lights up, this indicates that the resin is not detected by the probe; if the red indicator is off, this indicates that resin has been detected.
• If the green indicator of the detection module is on, this indicates that the power is on.

If insufficient resin is detected in the bottle when printing, the printer will beep to remind the user to add resin, and the automatic refill function will be disabled. If you want to turn on the automatic filling function again, add resin in time, then turn on the automatic filling function in the printing interface.
Precautions: 1. If Anycubic brand resin is not used, test by immersing the two needle probes of the detection module into resin before printing, if the red indicator cannot go out, this indicates that this resin cannot be used for the auto threading function. 2. If there is not enough resin in the bottle, the remaining small amount of resin cannot be pumped out by the automatic filling module. After changing the resin, the remaining resin can be poured into the bath to avoid waste. 3. Do not vigorously shake or invert resin bottles with auto-priming caps. If the inner surface of the bottle cap is contaminated with resin, clean it immediately to prevent resin from entering the outlet tube or clogging the bottle neck, which may cause failure or even damage to the automatic filling module.
2. Troubleshooting Guide


* If your problem still cannot be resolved after following the above steps, please contact the after-sales service personnel for technical assistance.
Common defects and maintenance of the Anycubic Photon M3 Max printer
1. Typical defects
(1) The model does not stick to the platform
The exposure time of the base layers is not enough, increase the exposure time. The contact area of the bottom of the model with the platform is small, add a raft. The platform is not properly leveled (the thickness of the printed layer is too large, or the platform is not horizontal)
(2) Model delamination and cracking
The printer was shaken while printing. The release film is loose due to prolonged use, replace it. The print bed or resin bath is not securely attached. The lift speed is too fast. Holes were not created in the walls of the model cavities.
(3) Layer shear or model deformation
Check if the supports are sufficient. Reduce the lifting speed.
(4) Algae-like phlox sticking to bathtub or model
This is caused by overexposure. Decrease exposure time of base layers and normal exposure time.
2. Printer maintenance
 |
1. If abnormal friction noise is heard from the Z axis when printing, apply an appropriate amount of lubricant to the Z axis trapezoidal rod. |
 |
2. Removing the remaining resin from the release film after printing failure: exposure is made with all screen LEDs on for 20 seconds, then remove the entire cured resin layer to effectively protect the release film. Do not scrape the resin from the release film with a sharp object to avoid damaging it. |
 |
3. Be careful not to drop the platform when removing it, otherwise the printer may be damaged. |
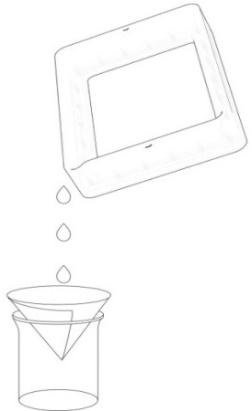  |
4. If the printer is not used within 48 hours, the resin must be poured into a storage container (the residue must be filtered out). |
| 5. After finishing printing, clean the platform (clean with a paper towel or rinse with ethanol), filter out solid residues in the bath (using a funnel). | |
| 6. If the printer is contaminated with tar, clean with ethanol. | |
| Before replacing with a resin of a different color, the former resin must be completely removed. |
Thank you again for choosing Anycubic products! We provide a warranty period for printers and their components up to one year. If you experience any problem, please log in to the Anycubic website (anycubic.biz/support/) to submit a claim for after sales services. Our qualified after-sales technical team will help you to disassemble everything.